Saturday, November 30, 2013
My interview by the guys at Gamefishing India
Gamefishing India Updates: Tackle and Tech Talk with Nicola Zingarelli of Car...: One of our first big groups back in 2007 was an Italian group led by Nicola Zingarelli an outdoor writer, professional recreationa...


Thursday, October 3, 2013
Molix' Jugolo Casting Jig

It is not us, is the fishermen who say that the Jugolo Casting Jig is probably one of the most effective casting jigs available in the market. We could try and sell you this lure with long and intrigued descriptions but, to be perfectly honest with you, we believe that either you google the web to see what others have to say about it or you just buy a couple and test it.
Do you fish for Bonitos? It will work. Sea Bass maybe? It will sure work? Sea Trouts? We bet it will do great.
Not much more to say, pick your favorite color and cast it. Then join the club of Jugolo's Lovers
Tuesday, September 17, 2013
Check out the renewed Caranx.net/store on-line shop

Don't forget to visit our sale items section
We are at your disposal if you need any suggestion, we fish since more than 40 years, 25 of those dedicated to lure fishing with almost 20 years of tropical popping and jigging experience.
Caranx.net shop is being on the market for 10 years now helping fishermen to find their best tackle.
See you around
ciao
Monday, February 18, 2013
Nativity scene from a Strobist point of view

When I saw this nativity scene in a small church in Spain I thought it could be a nice subject to light with a couple of speedlights. The church was empty; we were the only visitors so I decided to give it a try. After a bunch of non successful attempts I switched a bit the concept and went for a harsh backlighting and the whole mood of the scene changed.
I placed an SB800 on its small stand on the extreme left corner of the image gelled with a full CTO, wanted to recreate a sunset light as it could be seen in the region. The other SB800 was on my left side too with a Lastolite Softbox III in order to open the shadows on the figures and trying to illuminate a bit the inside of the shack. Couldn’t achieve that hence I asked my daughter to hold my led lamp and point at the Child Jesus, reduced the shutter speed to 1/20sec at f11 and took few shots until I managed to get some light on the main scene.
F11 might seem a bit too much but I guessed this would give me quite a decent depth of field, which is what eventually happened. Thus I had to push my ISO to 500. One extra flash would have given me a better control on the shadows of the figures closer to the lens but that’s what I had with me and I tried to get the best out of it
Wednesday, February 13, 2013
Windmills in Consuegras, Toledo, Spain.

This is quite a cool place in the hearth of Spain, Castilla la Mancha, the land of Don Quijote. In Consuegras there are 12 pretty well preserved windmill dating back to the half end of the XVI century. One of them can also be visited inside, I have images of that too, I might post them soon.
As usual the sun in the image is a must go for me, I love to play with such strong contrast that adds a dramatic touch to the whole image. I think that the little girl standing in the middle of the two windmills is quite a fortunate coincidence. I had to lift the foreground a bit in Lightroom, in fact even though I used a +2 exposure compensation still it was a bit underexposed.
This time I had with me the 10.5mm f2.8 Nikon fisheye, what a good chance to use it. It served me well during the day; in fact I left it on for the most part of the visit, I kind of missed it having not used it for a long time. Is a fun lens, nobody can deny it, can it be tiring? Yes, absolutely, but used with moderation still kicks some ass. ISO 200 f11 1/250sec on a Nikon D90
Tuesday, February 12, 2013
Molix WTD 110. Studio shot in a fish tank

These aquarium or fish tank shots are becoming a sort of trademark of my work within the fishing tackle industry. I learnt how to make them through Flickr, in fact one day I found the photos of a guy that was shooting old wooden lures in a plastic bowl and the result impressed me.
I had a small fish tank built for me and started playing with the lights and the lures splashing. I did my first attempts with a white background, way easier to handle, and then switched to a black background, more tricky yet with a better outcome. The problem is not the shot itself but the post production work that it takes to achieve a clean result, in fact, as you can imagine, bubbles and reflections – desired or not – are the by catch of such shots.
For this kind of photos I use quite a simple set up. Here we have two lights, one is on camera right higher than the lure at a 45º angle and the other one is on camera left more or less at the same height as the lure. The higher speedlight goes through a Honlphoto Grid, for a better control of the light, while the other flash as bare or sometimes with a small softbox, like Lumiquest Softbox III.
Friday, February 1, 2013
Dozens of boats with two strokes engines on the beach in Oman

Dozens of boats with two strokes engines on the beach in Oman, a photo by Nicola Zingarelli on Flickr.
Talk about perspective and depth of field...I was quite lucky, I could shoot at 1/250 at f10 with a 18-70 Nikon zoom at 63mm, hence keep a decent DOF.
These are dozens of boats with Yamaha enduro, two strokes engines, forbidden in many western countries, on the beach in Oman. This was quite an impressive view to be honest, in the morning you would see none while in the afternoon they would all be sitting under the sun.
I think is quite nicer in B&W, the color version was dull with that bleached sky.
Thursday, January 31, 2013
Molix' Mini Fish Grip studio shot

Is one light enough? It depends on what you're looking for. In this case I didn't want the whole product to be 100% discernible, hence I put one 40" Lastolite Umbrella Softbox (big soft wrapping light) with a SB800 and bang!
Thus, if I wanted to have the right side of the grip to be more visible I should have used, at least, one reflector or another light with a softbox for example. This way is more of an emotional and dramatic shot rather than a straight product shot.
Comments are apreciated, thanks.
Wednesday, January 30, 2013
Swan against black background

Don't know how you guys feel about this kind of images. Looks a tad unreal, with such a black background, but thing is that apart from few blotches it was pretty dark already. I only edited to make it completely black, in order to have the swan popping out against it. Looks like a "space swan" to me, but I do like the reflections and the strong contrast
Tuesday, January 29, 2013
Close up of a Red porgy caught on a Virago soft plastic

Lately I have dropped a bit the ultra wide angle lenses and put back the old Nikkor 35mm f2.
There are several reasons for me for such change. I'm looking for different framings, the focus is very accurate (something that is very important on a D7000) and I can get pretty close to the subject.
This lens allows me to shoot some cool close ups and most of all delivers an amazing amount of details. Open the full size version of this shot and you will see it by yourself.
Too bad the Nikkor 20mm f2.8 doesn't seem to be such a good lens otherwise I would have dropped it in my bag already, there's a nice second hand offer.
www.nicolazingarelli.com
Wednesday, July 18, 2012
When natural light and a reflector can help creating a studio shot
When playing with lights
sometimes you never know how many you might need and if you don't have enough,
well you still have the sun to help you. For these photos I had two SB800 but,
to achieve the desired effect I needed an extra help.
 |
| No "moving" reflector has been used for this shot |
First of all let’s see
how I organized the table. I have a squared piece of glass sitting on top of
four plastic cups to separate it from the base. Under the glass there is one
SB800 with a red gel, above the glass we have the Molix' Finder 110 sprayed with water. Off
camera right slightly above the subject is the other SB800 through a
translucent umbrella, while the window of the room is opened and its position
is again on camera right.
 |
| Here we are using the "moving" reflector but the SB800 with the red gel has been turned off |
On camera left a friend
is holding a silver reflector with a bit of a hammered surface; is not flat and
smooth and it works better for what I want to achieve. The exposure time is 2
seconds, enough to be able to play with the light coming from the window and
mix it with the speedlights.
 |
| Shot taken with the setting described in the post |
When
I take the shot my friend is moving the reflector for the 2 seconds of the
exposure and the light coming from the uneven silver surface paints some sort
of “blurred” background with liquid lights and shadows while the product has been
perfectly lit by the SB800. The water sitting on the glass surface also helps
achieving this result but as you can see in the three shots, the difference really
pops out.
It is very exciting for
me to always explore new ways of lighting a product, the studio gives you so many
different opportunities and the subjects never complain J I hope this give you some ideas for your studio
work and if you think of a way to improve it your comments are always welcome.
Friday, June 8, 2012
Lightroom 4.1 final version
After my
terrifying experience with LR 4.0 and the volume of negative comments running
around the web I thought that the guys at Adobe would have to work hard to fix
all the bugs the program was carrying along, and they should work fast too
because the competitors are fierce and ready to snack on any failing software,
especially if it comes from the nº 1 in the industry.
My major
problem was speed, so I worked on two directions, first of all I upgraded my
main hard disk to a 2TB unit and my graphic card to a 1GB model, and my second
move was to wait until Adobe would come out with a final version of 4.1, since
the Beta was still presenting some flaws.
Last
week the final version of 4.1 was announced so I diligently downloaded my tons
of megabytes and installed right after 4.0. Things, I must confess, have
changed quite a bit, the workflow is faster, the banding has disappeared and
4.1 is usable now. Let me be perfectly clear, is not as fast as 3.6, still is
quite sluggish when moving from image to image or when is “thinking” and loading
an image in the 1:1 view but for sure there’s an improvement since my previous
post.
The
trouble remains when using the clone tool and paint brush but I think there’s a
way around it. There is a major difference if you use the clone tool at the
beginning of your process or at the end (or midway) of it; when used at the
beginning it works quite normally but if you have played with other sliders
before, it can become a bit of a pain in the neck. The paint brush works a bit
smoother but it is also affected by how far have you gone with your editing.
From
what I have read in the net the culprits seem to be the clarity slider and the chromatic
aberration and sharpening modules. My investigation hasn’t go far enough to
study the individual parts so I cannot add much more to what I have learnt from
others, but anyone can do a test at home and see how it works for him. Bear in
mind that everyone has a different story, and what might work for me is
probably not working for somebody else and vice versa so the true experience is
the one you can make in your own machine.
This is
it for the moment, hope it helped a bit, any question drop a comment; I might be
out for few days but will be back on the 19th.
Monday, April 16, 2012
Lightroom 4.0, what a headhache!
More or less three weeks ago I bought Lightroom 4.0, the improvements and features over 3.6 looked so promising that I didn't hesitate a second to order it. Once installed I stared to update few photos to the new version; I was aware that the program was going to interpreter the settings and adapt them and I also knew that the images would probably look quite different. This was indeed confirmed so I had to re-edit a bit of photos, but I discovered it was extremely hard.
The program was sluggish to say at least, the lag when moving the mouse around the image, or clicking from one photo to another or doing all sort of thing I could easily do on 3.6 had become incredibly long. But this wasn't the worst problem, in fact once I started playing with the clone tool and paint brush things went out of control. The delay became unbearable and surprise surprise, a very odd green banding started to show up in my monitor. What was even more annoying was the fact that the green banding would also transfer to the photos exported to a folder in my hard disk, turning them unusable.
I browsed a bit the web and discovered that I wasn’t the only one with such problem, in fact hundreds of people, at least among those following specialist forums, were suffering the same delays and other more or less important flaws. Adobe put out in extreme hurry a 4.1 version that haven’t sort out the lag problems, is a beta and the final version will be released in June but it looks like they still have some work to do.
To make a long story short I deleted 4.0 from my PC and went back to 3.6a giving up the truly amazing new features that the new Lightroom was packed with. I don’t think Adobe will refund me for the purchase of 4.0 and I’m not even interested, what bugs me is that I will have to wait until they come up with software that rolls at least as well as the previous one. I have learnt my lesson the hard way, next time before any upgrade I’ll let the others do the test for me and then decide whether to join in or not.
Tuesday, April 3, 2012
Making of...


Monday, December 12, 2011
Putting the lights within the frame. Sculpo crankbait by Molix, studio shot

I have seen some cool images of guys putting their lights within the frame and for this reason I decided to try the same in one of my studio shots. What I wanted to reply, in a way more reduced scale, were the stadium or stage lights, all pointed to the subject that is the center of attention.
To achieve that I had to work on a table longer than usual and using a wider lens, otherwise I would have either missed the two SB800 that you can see in the frame, or too close to the subject with serious problems, at least for me, to control the light. In my first attempts I only used the two visible light, but even though the lure is translucent I was missing a good deal of light on it. After several try with reflectors I had to pick up a third light, Metz 58, and use it at its lowest power with a tight zoom and a grid to make the Sculpo pop up.
The result is in front of your eyes, I love the lights in the background even though I would have love them showing a "star" instead of the rectangular shape of the SB800, and I would have loved the product to be a bit bigger but I think I can work that out a bit.
If anybody has an idea of how to improve this kind of images please feel free to drop a comment either in the blog or in Flickr, I'd highly apreciate.
Wednesday, November 30, 2011
Special feature: Deep Trouble, the article that appeared in Sport Fishing December 2011 issue
Doug Olander, chief editor of Sport Fishing Magazine has given me the permission to post in the blog "Deep Trouble", the article that appears in the latest edition of SF in December. Is quite a complete feature with lots of information for the jigging enthusiasts and I'm honoured to have participated in it. To read it just follow the link: ARTICLE
Have a look at the Sport Fishing Magazine web site as well.
Thanks a lot to Doug, Sport Fishing Magazine and Bonnier Corporation
Friday, November 25, 2011
Tuesday, November 22, 2011
Main light? A mirror!
 That's right, the main light I have used for this shot is a circular mirror where I bounced the light of an SB800. The reason for this is because the snoot that I have doesn't give me a perfect circular rim of light and most of all because not long ago I watched an interesting video about lighting a product with mirrors and it looked pretty interesting to me. Interesting and challenging I add, in fact it is all about studying the angle of the light, a study that I believe most studio photographers had to go through at one point in their career. Since I don't use continuous lights, I had some trouble in finding the right angle to achieve the shot I wanted, it costed me a bit of batteries life through a bunch of test bursts until I figured out where the circle was going to sit for my shot. Hence, contrary to the appearences the speedlight is on camera right gridded it with a Honlphoto grid to control the light spill as much as possible, and it bounces the shaft against a circular mirror that becomes the main light and lit the three lures. Everything has been controlled with the Nikon CLS system. Camera Nikon D7000 with Nikkor 60mm f2.8 micro lens.
Tuesday, November 15, 2011
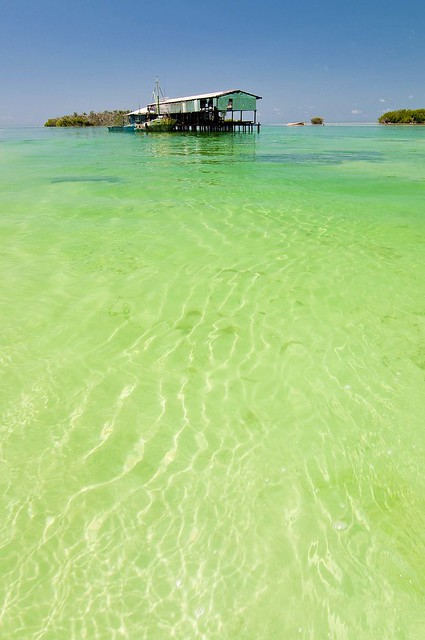
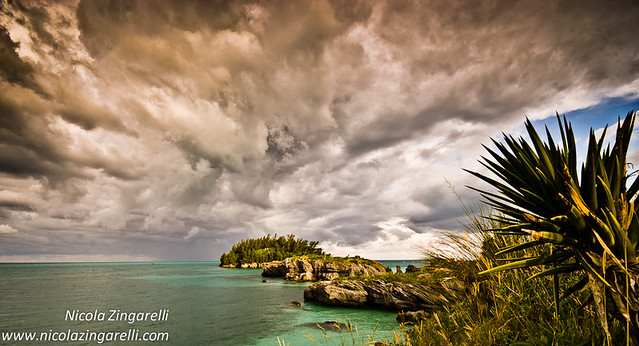
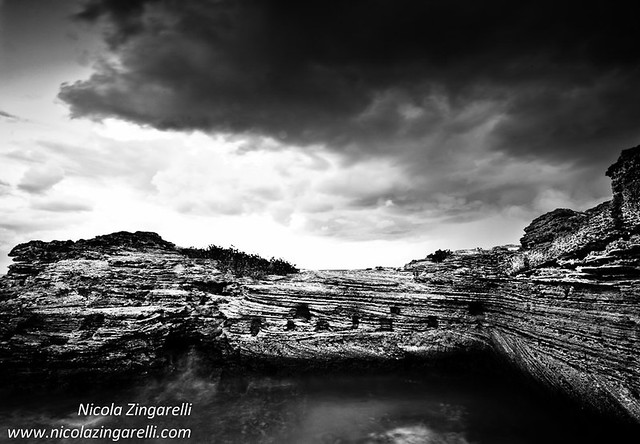
Composing a landscape shot


Thursday, November 10, 2011
Molix Vario crank. Fake HDR studio shot
There are millions of things you can do in a studio and another million you can do when you finally open your image in Lightroom, or any editing software for that matter. One day, bored to death, I decided to try a fake HDR of one of my lures shots: this is how I worked it out.
First I made two copies of the shot (virtual copies in Lightroom) at + 1 1/2 EV and - 1 1/2 EV, then I opened them together with the original shot in Photomatix. Here I edited the blended image with a bit of a not too realistic processing and the result is in front of your nose. Brighter colors, and more details, something that pops out of the screen, almost 3D, but probably too unrealistic to be taken into consideration. Good fun though!
www.nicolazingarelli.com
www.caranx.net

First I made two copies of the shot (virtual copies in Lightroom) at + 1 1/2 EV and - 1 1/2 EV, then I opened them together with the original shot in Photomatix. Here I edited the blended image with a bit of a not too realistic processing and the result is in front of your nose. Brighter colors, and more details, something that pops out of the screen, almost 3D, but probably too unrealistic to be taken into consideration. Good fun though!
www.nicolazingarelli.com
www.caranx.net
Subscribe to:
Posts (Atom)


