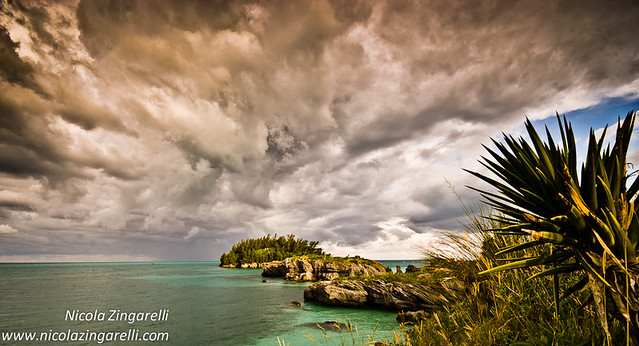
When composing a seascape photo there are some elements that we want to combine in order to achieve a better shot. Having a nice scenary in front of your lens sure helps, but it might not be enough. A dull sky could kill our best intentions or a harsh directional light, can bury the image in a blink of an eye. Those fantastic sunsets don't go any further than the simple snapshot if we don't have a foreground that helps the composition, and this photo here might give an idea of what use can we make of any subject to strengthen the image.

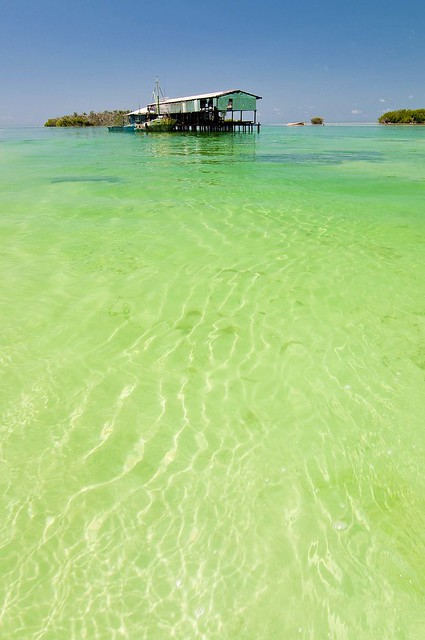
Another important point to stress out is where to place the horizon. When we start moving our first steps in the magic world of photography we take specific care to put subjects and horizon exactly in the middle of the frame, something that could work for a very specific image, one in a hundred maybe... To give more strength to our photo we should try to move that thing to a different level, maybe higher, maybe lower, left or right, away from the dead center anyway. This is called rule of thirds and has been created by painters in the previous centuries, we are only borrowing it from them. The more extreme the latitude of the horizon, the more dramatic is the shot, even without a predominant foreground, like in this case.

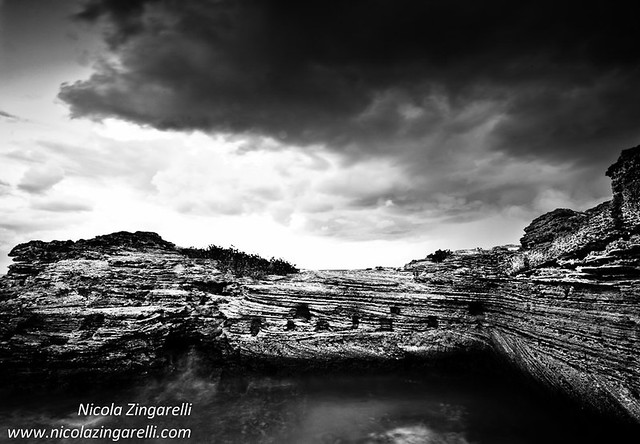
We also need lines, straight or curved, that can somehow guide the view through the image, or to a specific point that we consider to be the most important of the image. A pinnacle of rocks that comes from one side of the image and slowly dives into the hot spot of the photo, will help the viewer scanning the frame and hitting the target, the dramatic stormy sky like in this shot for example.
Remember that we are on the coast; there are rocks, sand, stones, old logs, rippling water, many different elements with something in common: texture. This is an element that could create a shot on its own, it really depends how we are able to grab the light hitting the texture and what kind of editing we apply in post production. Even a gloomy sky has its own texture, and again it will help creating a dramatic atmosphere that looks so good on seascape shots. Black & white edit sometimes helps.

Last but not least, in fact is probably the most important thing of the whole creative process, the light. I'm not going to be the first one to tell you that a sidelight or backlight (when the sun is facing you) is the ideal one for your best image, but I'll be the millionth and one to repeate it because it really is the heart of the matter here. For several different reasons backlight is my favourite, but is also the more complicated to handle, in fact you will need grad filters (I used a tobacco grad here) to control it and even so, nailing the exposure and keeping the highlights under control will not be very easy. Pick up the sun when is low on the horizon, either at sunrise or sunset and your photo will gain some amazing long shadows and if you are lucky to have a cloudy sky with the red ball filtering through it, you're in photographer's heaven.


 One day I was looking for my first Neutral Graduated Filter to buy and hopped into a Madrid shop. The lady at the desk looked at me with a strange face, as if I was asking for some weird sado-maso rubber accessory. “Now, with Photoshop, nobody uses filters, we don‘t sell them anymore, you don’t need them”. This translates into this: “Sorry buddy, I know nada de nada about photography and you also caught us out of stock because the manager of this shop is a plain idiot and has lost the plot.”
 Fair enough, in Madrid there’s also a great photography outlet (www.fotocasiondigital.com) and you can find there everything you need. So I was pretty relieved when I finally found my Cokin ND filters and started playing with them. First I bought a Soft Grey Neutral (P121S), then a Medium Grey Neutral (P121M).
  I grabbed a Hard Tobacco Grad (P125). I have seen photos in the mags and the web done with this filter and I loved the result, is quite addictive. In fact at the moment my number one choice, even though I resist myself to use it all the time for reasons you can easily understand.
  Now, from this series you have two holders to choose. The P Filter-Holder is good to stuck up to three filters but is a bad choice if you use ultra wide angle lenses. The edges of the holder sneak into the frame and I had to zoom to 14mm at least to get a clean image. Again, the clerk in Fotocasión, this time a good photog himself, showed me the right one: the P-Wide Angle Holder. Is thinner, and you can only slide in one filter but it allows you to shoot (on DX format) even at 11 or 12mm, or 10mm if you don’t mind cropping a bit the image later (it darkens the corners a bit). If you use FX or 35mm film Cokin suggests using it with 20mm filters (some more information here: http://www.cokin.com/ico15/ico15-haut.html?=#p)
 Skies will be 1, 2, 3 or even 4 stop brighter than the land and if you don’t do HDR or don’t care for multiple exposures blending, either you use a filter or you’re doomed to an underexposed land or a washed out sky. The neutral density graduated filters will allow you to reduce this difference: the grey part of the filter will reduce the luminosity of the sky and the clear part will leave the exposure that you choose for the land untouched.
  It is important to say that the graduated filters cannot always be used for every landscape shot. They are recommended in those situations where the edge between the land and the sky is flat, but if you have trees or mountains the filter will inevitably darken these too, and they won’t look too good.
 point, yet, I doubt you can recover burned highlights or a completely white sky. These filters don’t cost a fortune and they save your butt in a lot of good photographic situations. If you go to a shop and the clerk tells you that there’s no need for filters anymore, just do yourself a favour, change retailer….
 The familiar noise of the running water raised my spirits. I put my high boots, grabbed the camera and tripod and took my way down to the valley, where the Jarama River was running. The photo session was OK but nothing spectacular, many different shots in places that somehow called my attention, but I was enjoying it. Every time I go out to take a picture I try to take it as a learning experience, not thinking about coming out with a winning image. Hence, whatever it comes, if is an improvement over previous tries is a goal achieved.
  The first shot I'm showing here is very orthodox. Cloudy white balance and nothing else. I like it but is probably average, it doesn't have any special "edge".
 This is a B&W conversion of the same shot, maybe is a little bit more appealing because of that Black & White feeling yet is not a gigantic improvement. For a novel photographer like me is a nice image but I understand that it cannot compete on the major league
 Here things started to get a tad odd. I changed to WB to tungsten and played with the SB600 speed light with two full CTO gels on it. The result is a tad exaggerated, the "Bridge" is cooked, way too hot. There's a lot of flash light spills on the ground as well.
 econd attempt. Mellowing down on the gels and the amount of flash bursts. Changed the white balance in RAW to something closer to Fluorescent rather than Tungsten. The result has improved a bit but at least to me it still looks a bit too hot.
 Third attempt. Maybe I'm wrong but I think this is the right way. There's no signs of the flash bursts on the ground and the color given to the "bridge" is more natural, yet still creates a contrast with the background. Unfortunately I couldn't paint with the flash further that half the log. For my next attempt I will try with a torch.
 Last week-end we went for a day to Medinaceli, a small village north of Madrid, quite a nice one. I like to walk around town grabbing images of the historical part (well, almost the whole place is historical). I have done it two or three times already and have collected a nice deal of images. I said a nice deal of... I didn't say nice images...! Well, the other day we walked to the other side of the village, where the fields and I saw this image in front of me. No tripod available so I had to rely on the lens' VR to get a decently sharp image. I kinda like this photo, is a bit "empty" on the left side but the landscapes with the windmills generates a decent contrast with the "old fashioned" foreground. Do you like it at all?


