Stock Photo Gallery

Monday, April 16, 2012

Lightroom 4.0, what a headhache!

More or less three weeks ago I bought Lightroom 4.0, the improvements and features over 3.6 looked so promising that I didn't hesitate a second to order it. Once installed I stared to update few photos to the new version; I was aware that the program was going to interpreter the settings and adapt them and I also knew that the images would probably look quite different. This was indeed confirmed so I had to re-edit a bit of photos, but I discovered it was extremely hard.

The program was sluggish to say at least, the lag when moving the mouse around the image, or clicking from one photo to another or doing all sort of thing I could easily do on 3.6 had become incredibly long. But this wasn't the worst problem, in fact once I started playing with the clone tool and paint brush things went out of control. The delay became unbearable and surprise surprise, a very odd green banding started to show up in my monitor. What was even more annoying was the fact that the green banding would also transfer to the photos exported to a folder in my hard disk, turning them unusable. 

I browsed a bit the web and discovered that I wasn’t the only one with such problem, in fact hundreds of people, at least among those following specialist forums, were suffering the same delays and other more or less important flaws. Adobe put out in extreme hurry a 4.1 version that haven’t sort out the lag problems, is a beta and the final version will be released in June but it looks like they still have some work to do.

To make a long story short I deleted 4.0 from my PC and went back to 3.6a giving up the truly amazing new features that the new Lightroom was packed with. I don’t think Adobe will refund me for the purchase of 4.0 and I’m not even interested, what bugs me is that I will have to wait until they come up with software that rolls at least as well as the previous one. I have learnt my lesson the hard way, next time before any upgrade I’ll let the others do the test for me and then decide whether to join in or not. 

Tuesday, April 3, 2012

Making of...

How do you think I made this photo? Few hints: There's one main light and a fill light and in the background there's a .... The exposure is 4 seconds, does it ring a bell? New high tech stuff can make miracles for your studio shots

Monday, December 12, 2011

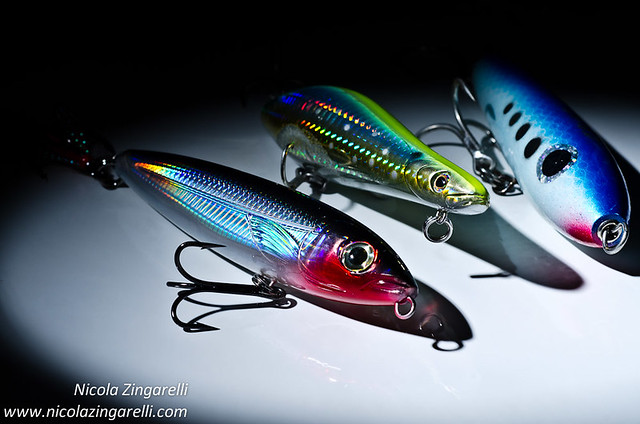
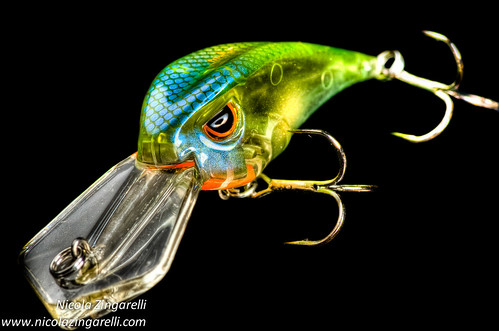
Putting the lights within the frame. Sculpo crankbait by Molix, studio shot

Molix Sculpo lure. Studio shot with three lights by Nicola Zingarelli

One of the simple rules I have understood in this photography business is that eventually there are NO RULES!

I have seen some cool images of guys putting their lights within the frame and for this reason I decided to try the same in one of my studio shots. What I wanted to reply, in a way more reduced scale, were the stadium or stage lights, all pointed to the subject that is the center of attention.

To achieve that I had to work on a table longer than usual and using a wider lens, otherwise I would have either missed the two SB800 that you can see in the frame, or too close to the subject with serious problems, at least for me, to control the light. In my first attempts I only used the two visible light, but even though the lure is translucent I was missing a good deal of light on it. After several try with reflectors I had to pick up a third light, Metz 58, and use it at its lowest power with a tight zoom and a grid to make the Sculpo pop up.

The result is in front of your eyes, I love the lights in the background even though I would have love them showing a "star" instead of the rectangular shape of the SB800, and I would have loved the product to be a bit bigger but I think I can work that out a bit.

If anybody has an idea of how to improve this kind of images please feel free to drop a comment either in the blog or in Flickr, I'd highly apreciate.

Wednesday, November 30, 2011

Special feature: Deep Trouble, the article that appeared in Sport Fishing December 2011 issue

Doug Olander, chief editor of Sport Fishing Magazine has given me the permission to post in the blog "Deep Trouble", the article that appears in the latest edition of SF in December. Is quite a complete feature with lots of information for the jigging enthusiasts and I'm honoured to have participated in it. To read it just follow the link: ARTICLE

Have a look at the Sport Fishing Magazine web site as well.

Thanks a lot to Doug, Sport Fishing Magazine and Bonnier Corporation

Tuesday, November 22, 2011

Main light? A mirror!

Studio shot for a magazine, three walking the dog lures lit with one light reflected against a circular mirrorThat's right, the main light I have used for this shot is a circular mirror where I bounced the light of an SB800. The reason for this is because the snoot that I have doesn't give me a perfect circular rim of light and most of all because not long ago I watched an interesting video about lighting a product with mirrors and it looked pretty interesting to me. Interesting and challenging I add, in fact it is all about studying the angle of the light, a study that I believe most studio photographers had to go through at one point in their career. Since I don't use continuous lights, I had some trouble in finding the right angle to achieve the shot I wanted, it costed me a bit of batteries life through a bunch of test bursts until I figured out where the circle was going to sit for my shot. Hence, contrary to the appearences the speedlight is on camera right gridded it with a Honlphoto grid to control the light spill as much as possible, and it bounces the shaft against a circular mirror that becomes the main light and lit the three lures. Everything has been controlled with the Nikon CLS system. Camera Nikon D7000 with Nikkor 60mm f2.8 micro lens.

Tuesday, November 15, 2011

Composing a landscape shot

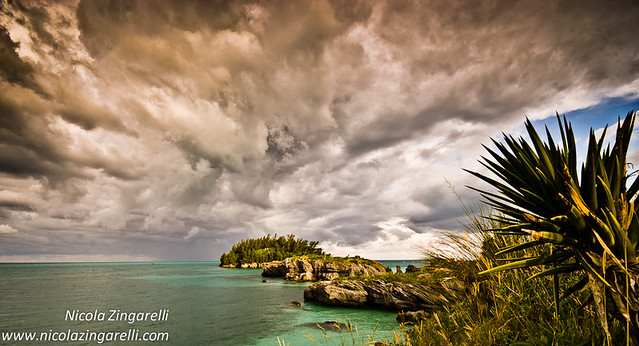
When composing a seascape photo there are some elements that we want to combine in order to achieve a better shot. Having a nice scenary in front of your lens sure helps, but it might not be enough. A dull sky could kill our best intentions or a harsh directional light, can bury the image in a blink of an eye. Those fantastic sunsets don't go any further than the simple snapshot if we don't have a foreground that helps the composition, and this photo here might give an idea of what use can we make of any subject to strengthen the image.

Another important point to stress out is where to place the horizon. When we start moving our first steps in the magic world of photography we take specific care to put subjects and horizon exactly in the middle of the frame, something that could work for a very specific image, one in a hundred maybe... To give more strength to our photo we should try to move that thing to a different level, maybe higher, maybe lower, left or right, away from the dead center anyway. This is called rule of thirds and has been created by painters in the previous centuries, we are only borrowing it from them. The more extreme the latitude of the horizon, the more dramatic is the shot, even without a predominant foreground, like in this case.

We also need lines, straight or curved, that can somehow guide the view through the image, or to a specific point that we consider to be the most important of the image. A pinnacle of rocks that comes from one side of the image and slowly dives into the hot spot of the photo, will help the viewer scanning the frame and hitting the target, the dramatic stormy sky like in this shot for example.

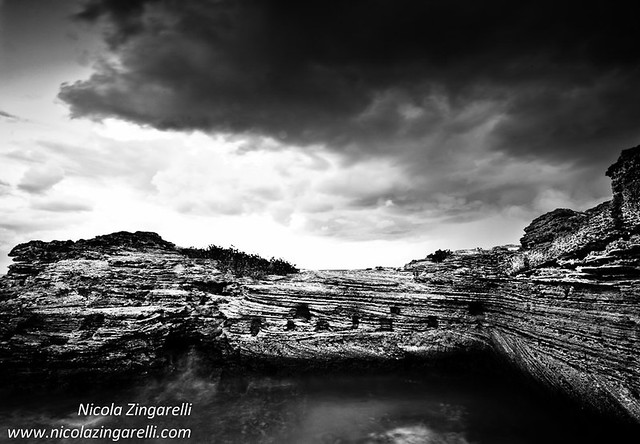
Remember that we are on the coast; there are rocks, sand, stones, old logs, rippling water, many different elements with something in common: texture. This is an element that could create a shot on its own, it really depends how we are able to grab the light hitting the texture and what kind of editing we apply in post production. Even a gloomy sky has its own texture, and again it will help creating a dramatic atmosphere that looks so good on seascape shots. Black & white edit sometimes helps.

Last but not least, in fact is probably the most important thing of the whole creative process, the light. I'm not going to be the first one to tell you that a sidelight or backlight (when the sun is facing you)  is the ideal one for your best image, but I'll be the millionth and one to repeate it because it really is the heart of the matter here. For several different reasons backlight is my favourite, but is also the more complicated to handle, in fact you will need grad filters (I used a tobacco grad here) to control it and even so, nailing the exposure and keeping the highlights under control will not be very easy. Pick up the sun when is low on the horizon, either at sunrise or sunset and your photo will gain some amazing long shadows and if you are lucky to have a cloudy sky with the red ball filtering through it, you're in photographer's heaven.

Thursday, November 10, 2011

Molix Vario crank. Fake HDR studio shot

There are millions of things you can do in a studio and another million you can do when you finally open your image in Lightroom, or any editing software for that matter. One day, bored to death, I decided to try a fake HDR of one of my lures shots: this is how I worked it out.
First I made two copies of the shot (virtual copies in Lightroom) at + 1 1/2 EV and - 1 1/2 EV, then I opened them together with the original shot in Photomatix. Here I edited the blended image with a bit of a not too realistic processing and the result is in front of your nose. Brighter colors, and more details, something that pops out of the screen, almost 3D, but probably too unrealistic to be taken into consideration. Good fun though!

www.nicolazingarelli.com
www.caranx.net

Saturday, October 22, 2011


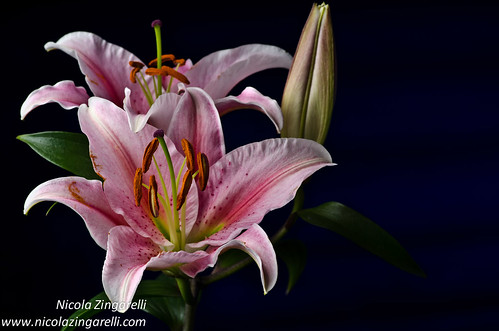
Studio shot of white and pink flowers with a two light set by Nicola Zingarelli
Flowers make for beautiful and very patient subject for your studio photo sessions. They don't move and have that inner (and outer) beauty that just need a bit of sensibility to come out and fill the frame. Thing is that I’m not a flower photographer, at least not one of those that ravenously search fields and botanical gardens, I’m rather one of those that when there’s a flower at home grabs it and put it in front of the camera. I’m also the one who usually brings the floral gifts so at least I can pick those I think can make a nice subject too. 
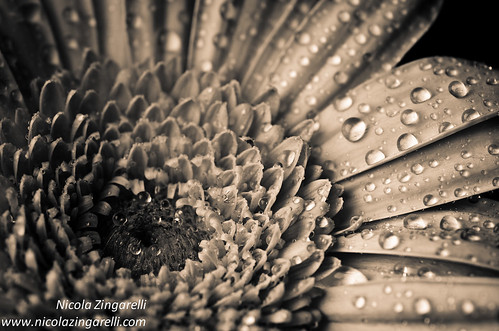
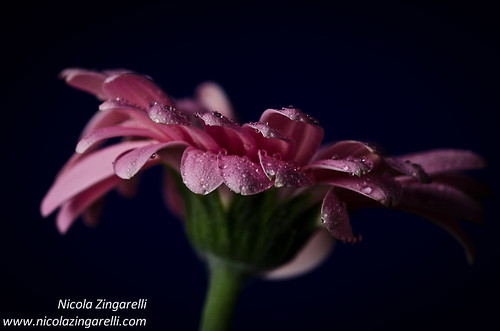
Photographing flowers for me means soft light, soft images, and mostly a low key shot, well at least now, maybe tomorrow I’ll go hard and high key, truly don’t know… My set for this session was based in two lights, one for the flower and the other for the background. I didn’t use any reflector pursuing my quest of a light gradually fading and leaving an area into a certain degree of darkness. The light for the background carried a blue gel, in order to create a color contrast with the subject and also because I love blue background, they’re way classy!

The main light for all shots was one of my SB800 through a Lastolite EzyBox on camera left, while the other SB800 was gridded with a Honlphoto grid pointing at the black background. For each one of these three shots I was looking for something different and I hope it shows. Details, lighting, point of view and depth of field and of course, there has been a bit of work in Lightroom to come up with the final image. Water spray was used to enhance reflections and textures in a couple of flowers, and I think it is a good plus. Hope you like them, if you need any further information please drop a comment

Saturday, October 15, 2011

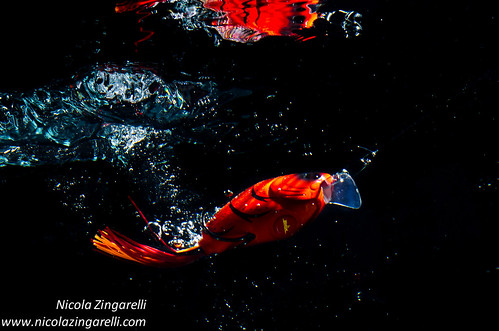
Lures diving in the water, studio shot with two lights on a blackbackground


Lure diving in the water, studio shot with two lights on a black background by Nicola Zingarelli
Yesterday a friend showed me an image of a lure swimming in the water on a black background. This was some sort of relief because when I did my first test, I had to quit the idea of using a black background because reflections flare and light spills were everywhere. So yesterday, with renewed energies I set up my studio and the first thing I did, in addiction of putting my black vinyl background, was to cover 2 sides of the tank with black cardboard.
I also got rid of the large lights, any umbrella or softbox would send too much light out of control so I decided to go hard and small. One SB800 was set with its dome and the other with a Honlphoto Grid one of each of the narrow side of the tank, power settings changed a lot during the session so is hard to tell which has been the most commonly used. I also switched the main light from one speedlight to the other, again hard to tell some sort of rules.
Once everything was set the first test shots were suggesting a decently dark background that could be easily manipulated in Lightroom, giving me the proper black I needed. Now I needed to find a way to focus on the lures, so I put one in the middle of the tank, same distance from the two longest walls, and hoped for the best. I obviously took the focus with the lure under the water, I have read somewhere that the liquid element not only increase the magnification of the objects but also swift the focus point.
Since I was on my own I needed something that could help me moving the lures, for this reason I tied them to a thin fishing line of the length of the longest side, with a weight on the other end. I could pull the lure to one end of the tank, the weight would lift up to the opposite edge and once I released the lure the weight would pull it to the other side … gravity!
I shot with the camera parallel to the wall of the tank, with a bit of angle from above, a pretty high angle, and a very low one and achieved different results. Parallel or with a small angle worked fine, the images are sharp when the focus is on the money, but from a very high or very low angle, like in this image, sharpness and focus became an issue and I believe that is because of the thickness of the glass, that would create refraction and a bit of distortion. I’m not an expert on this matter but I believe I’m not far from the scientific explanation.
I made so many shots that my D7000 was smoking, well at least it was very hot and sometimes needed a break to process the files. The SB800 showed how good they are for the hard work, not a single complain, never stopped, always recycling fast and with just one set of batteries. Some intensive processing in Lightroom followed, I needed the blacks to be black, and the lures to be sharp and well exposed. It has sure been a challenging experience, I have made an unlimited number of mistakes and probably none of the images is really good, but it has been my first step, hopefully I’ll do it better next time.